
If you’re facing the unfortunate situation of a broken dryer belt, don’t fret. It’s a common issue that many homeowners encounter, but fortunately, it’s a problem you can fix on your own. In this comprehensive guide, we’ll walk you through the process of repairing a broken dryer belt. With a few tools, some patience, and the right instructions, you can have your dryer up and running in no time.
Understanding the Dryer Belt
Before we dive into the repair process, let’s understand the role of the dryer belt.
What is a Dryer Belt?
A dryer belt, also known as a drive belt or serpentine belt, is a critical component in your dryer’s operation. It connects the motor to the drum, enabling it to spin and circulate hot air, which is essential for drying your clothes effectively.
Signs of a Broken Dryer Belt
Identifying the signs is the first step in dryer belt repair. So let’s find out some of the common signs.
- No Drum Rotation: When the dryer is on, but the drum doesn’t spin, it’s a clear indication of a broken belt.
- Unusual Noises: You might hear strange noises like squeaking or thumping, which can result from a damaged belt.
- Clothes Not Drying: If your dryer is running, but your clothes aren’t drying properly, the broken belt could be the culprit.
Tools and Materials You Need
Before you begin the repair, gather the necessary tools and materials:
- Screwdriver
- Replacement dryer belt
- Putty knife
- Work gloves
- Owner’s manual (for reference)
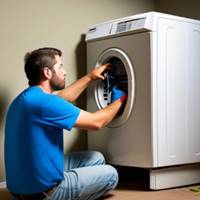
How to Fix a Broken Dryer Belt
A broken dryer belt repair may seem like a daunting task, but with our comprehensive step-by-step guide, you’ll find it surprisingly manageable. Follow these detailed instructions to ensure a successful dryer belt replacement:
Accessing the Dryer Belt
- Remove the Top Panel: Start by removing the top panel of your dryer. You’ll typically find screws securing it in place. Use a screwdriver to carefully detach these screws. Once removed, lift the top panel and set it aside.
- Remove the Front Panel: With the top panel out of the way, you can now access the front panel. Be cautious and disconnect any wires that are connected to the door switch. Once you’ve ensured that all wires are safely disconnected, remove the front panel. This step may vary slightly depending on your dryer’s model, so consult your owner’s manual for guidance.
Removing the Old Belt
- Release Tension: To remove the old belt, you’ll need to release the tension it exerts on the drum. You can do this by either moving the idler pulley or adjusting the motor bracket, depending on your dryer’s design. Refer to your owner’s manual for specific instructions.
- Slide Off the Old Belt: Carefully slide the old, broken belt out from around the drum and motor pulley. Take note of the belt’s path and how it’s threaded through the various components. This will be crucial when installing the new belt.
Installing the New Dryer Belt
- Wrap the Belt Around the Drum: Now, take your new replacement dryer belt and position it around the drum in the same path as the old belt. Consult your owner’s manual or any markings on the dryer for guidance on the correct routing of the belt. Ensure that it’s snugly wrapped around the drum.
- Tension the Belt: Reapply tension to the belt. This step is essential for proper operation. If you moved the idler pulley or motor bracket earlier, carefully return it to its original position to maintain tension on the belt. This tension is what allows the drum to rotate effectively.
Reassembling the Dryer
- Reattach the Front Panel: With the new belt in place, it’s time to reattach the front panel. Remember to reconnect any wires that were disconnected earlier. Be meticulous about reconnecting them correctly to avoid any electrical issues.
- Secure the Top Panel: After successfully reattaching the front panel, fasten the top panel back into place using the screws you removed earlier. Ensure that it’s securely in position.
Testing Your Dryer
- Plug in and Test: Before you breathe a sigh of relief, plug your dryer back into the power source. Run a test cycle to confirm that the new belt is functioning correctly. Listen for smooth operation, and ensure that the drum is spinning as it should.
Wrap Up
Broken dryer belt repair might seem daunting, but with the right guidance and a bit of patience, it’s a task you can accomplish on your own. By following these step-by-step instructions, you’ll save money on professional repairs and have your dryer back in working condition.
Frequently Asked Questions (FAQs)
How do I know if my dryer belt needs replacement?
– Look for signs like the drum not spinning, unusual noises, or clothes not drying properly.
Can I use any replacement belt for my dryer?
– It’s best to use the specific replacement belt recommended in your dryer’s owner’s manual.
Do I need special skills to replace a dryer belt?
– Basic DIY skills and the ability to follow instructions are usually sufficient for this task.
How often should I replace my dryer belt?
– Dryer belts typically last several years, but it’s a good idea to replace them if you notice signs of wear or damage.
Are there any maintenance tips to prolong the life of my dryer belt?
– Keep the dryer clean, avoid overloading it, and check for any loose items that could cause damage to the belt.
Hello, I’m James, the founder of FixitAllSecure.com. With over 10 years of experience in appliance repair, I’ve made it my mission to assist homeowners like you in resolving appliance issues, saving you precious time and money. From practical repair guides to prevention tips, I’m here to ensure your appliances run smoothly and your household stays stress-free.
